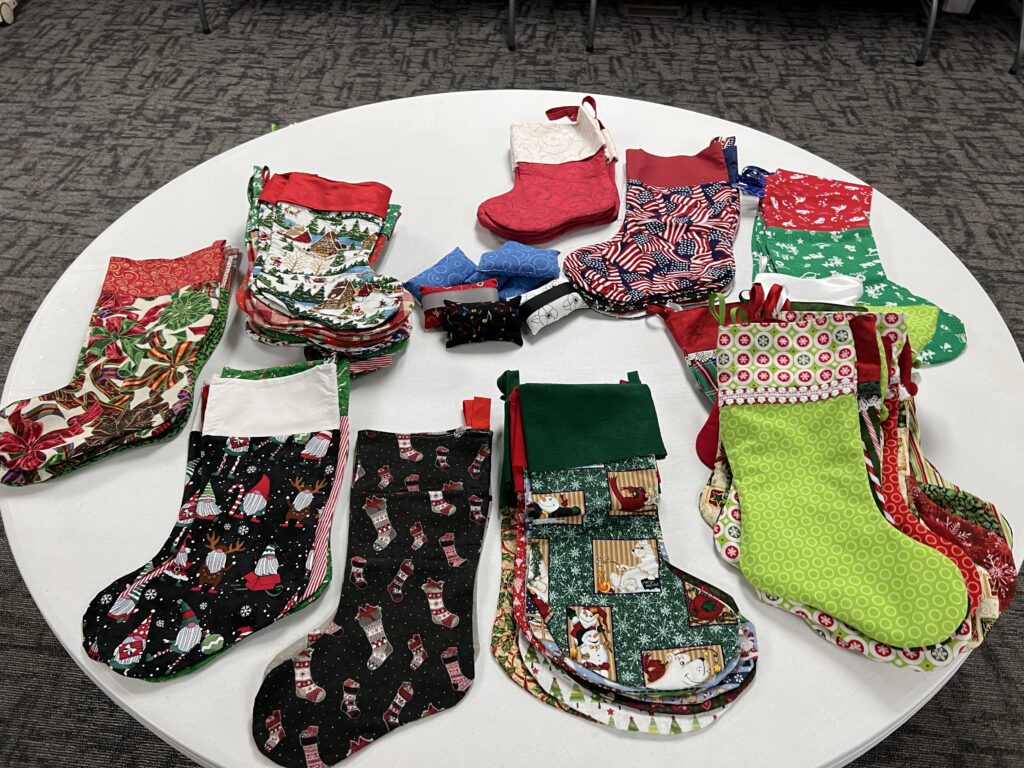
Christmas Stocking Instructions
Click here to download the pattern
Be sure to print at 100% or actual size
If you are sewing the Christmas stocking for the Blue Star Mothers, they ask that you not use a quilted fabric, batting in the stocking, and do not add any ribbons or buttons or any item to the stockings. As the Blue Star Mothers pack the stocking for shipment, the thickness of the stocking can take up room in the package. Blue Star Mothers try to get as many stockings in a package as they can.
If you are making the stocking for yourself, feel free to use any type of fabric that you want. You will need the following items.
- 5/8 yd. Fabric for the stocking, stocking cuff, and stocking hanging loop
- 5/8 yd. Fabric for lining if you choose to line the stocking and cuff
- Thread
If you want to add any type of decoration such as piping, lace, ribbon, or whatever, just take the measurement where the decoration would go and use that amount.
- Cut 2 pieces of fabric for the stocking
- Cut 2 pieces of lining fabric for the stocking
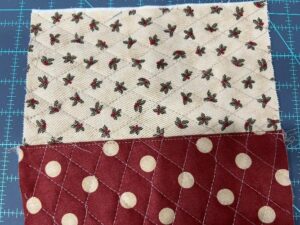
- Cut 2 pieces of fabric for the stocking cuff
- Cut 2 pieces of lining fabric for the stocking cuff
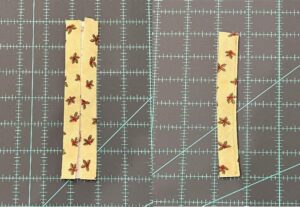
- Cut 1 piece of fabric for the stocking hanging loop
As a suggestion to hide the inside seam
- you can use binding to hide the inside seam allowance
- you can serge the inside seam
- you can use an overlocked stitch from you sewing machine
All these suggestions are dependent on the type of fabric that you choose. Also, if you are lining the stocking, a straight stitch for the lining will work as this will be inside the stocking. The choice is up to you.
When sewing the stocking use a 1/4”, or 3/8”, or 1/2” seam allowance. The seam allowance will depend on the type of fabric and/or quilting you are using.
Print out all the pattern pieces. On the print out of the foot of the stocking, you will see the bottom of the grainline arrow. You will also see the grainline arrow at the top of the stocking. Match the foot grainline arrow to the bottom of the grainline arrow from the top of the stocking. Tape the 2 pieces together. This will give you a full pattern piece to cut out the stocking.
For the stocking hanging loop, cut a 6 ½” long and 2 ½” wide strip.
Cut 2 pieces of the stocking and cut 2 pieces of the stocking cuff
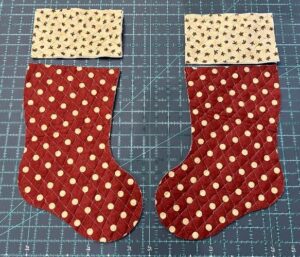
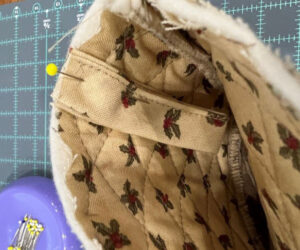
On one piece of the stocking, attach the cuff to the top of the stocking, right sides together and sew. Do this to both pieces of the stocking. We suggest that you topstitch the cuff on the right side of the fabric.
To make the stocking hanging loop, press the loop in half and this will be the center line. Open and press one side to the center line and then press the other side to the center line. Then fold over and stitch on the side. The hanging loop is now ready to attach to the stocking.
Once the cuff is attached, put the 2 stocking pieces together and sew around the stocking but not on the top of the cuff. Attach the hanging loop on the heel side of the stocking. Sew the hanging loop in place. Either with a ¼” or 3/8” seam allowance. It depends on the type of fabric you are using.
If you are lining the stocking, we suggest the following
- Line up the stocking and the cuff as one piece. Keep in mind the bottom of the cuff piece you have stitched ¼” attaching it to the stocking
- When sewing the lining leave an opening about 2-3 inches on the lining to turn the stocking inside out.
When you have sewn the lining together, attach the lining right side together and sew across the top. Turn inside out from where you left the 2-3 inch opening on the lining. You can hand sew the opening closed.
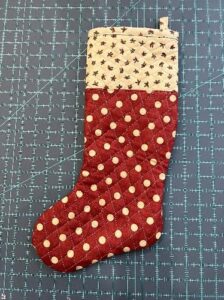
Congratulations on making your Christmas Stocking