Which Measurement Chart Should I Use?
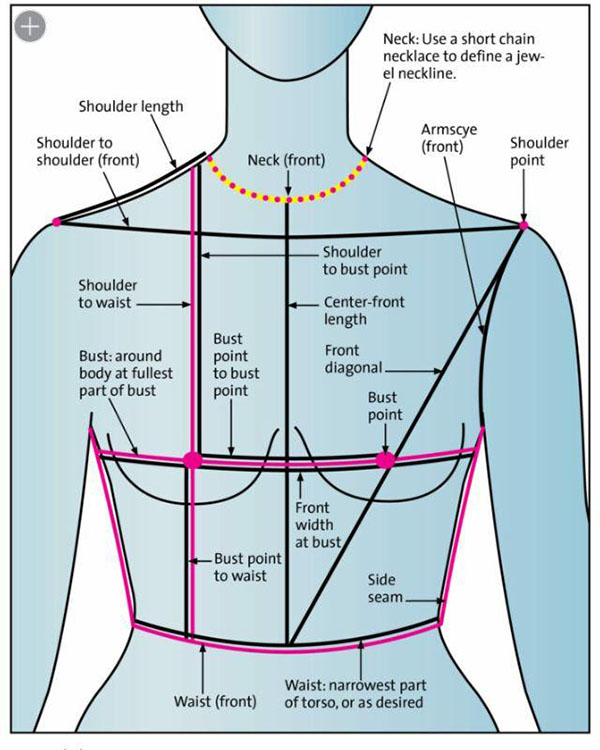
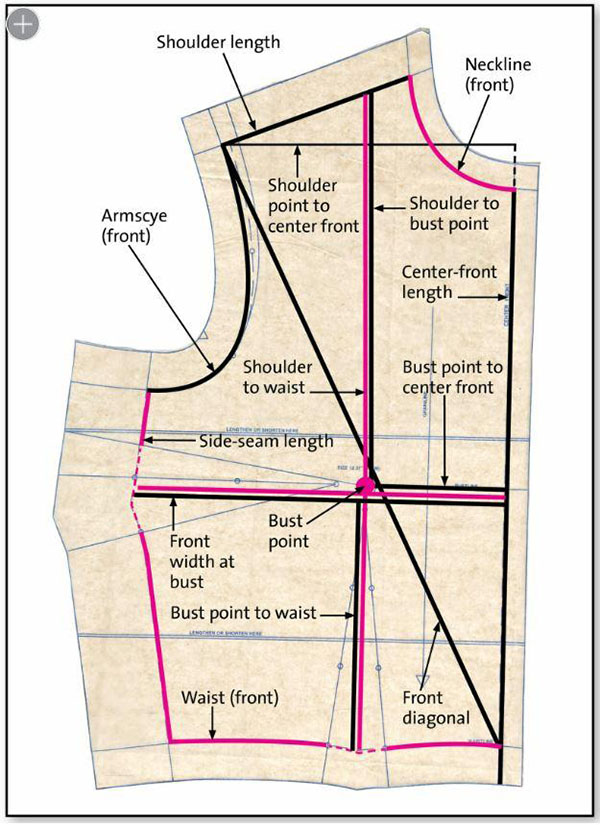
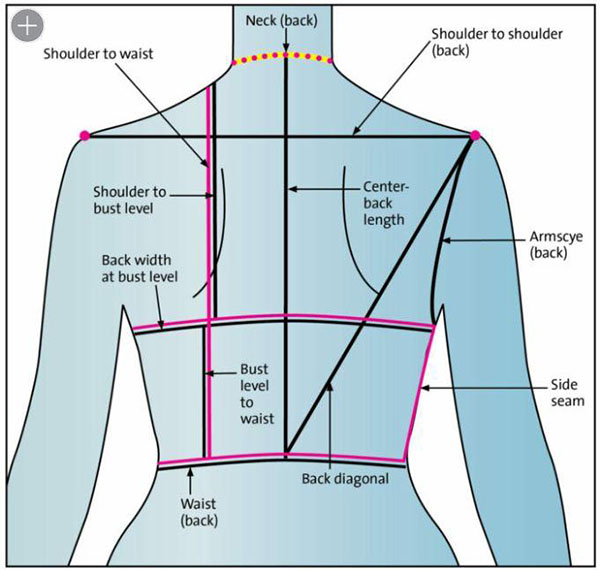
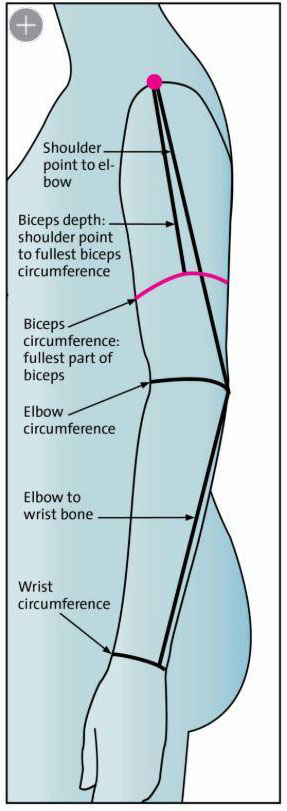
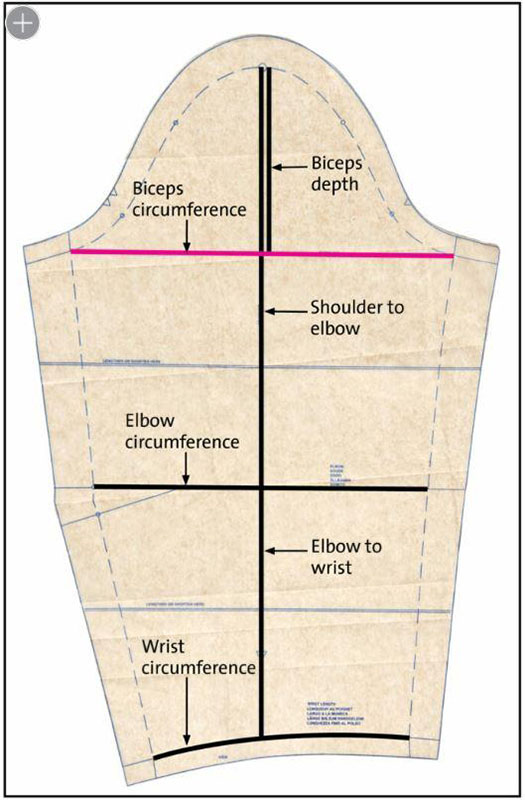
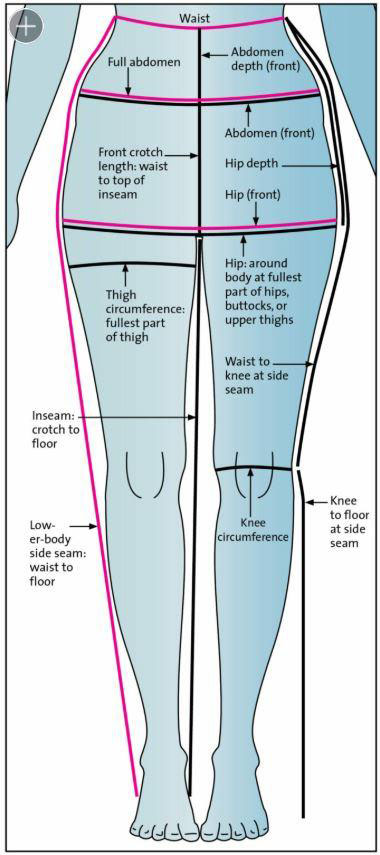
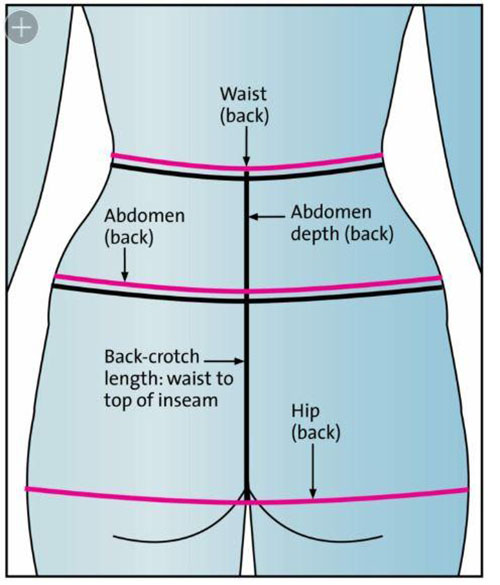
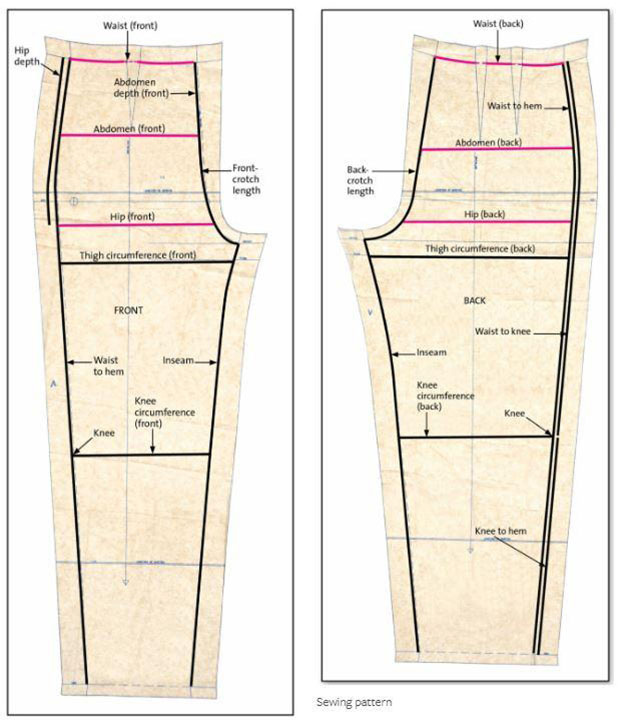
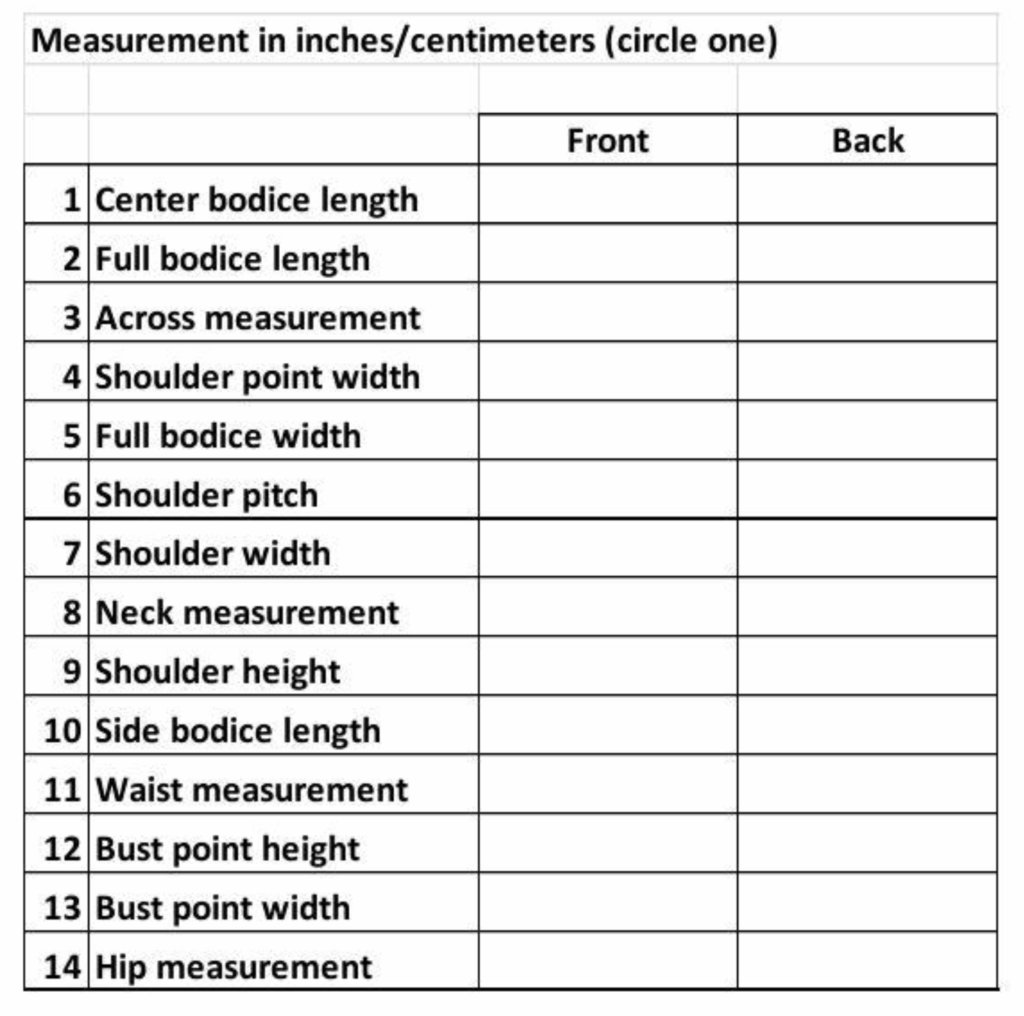
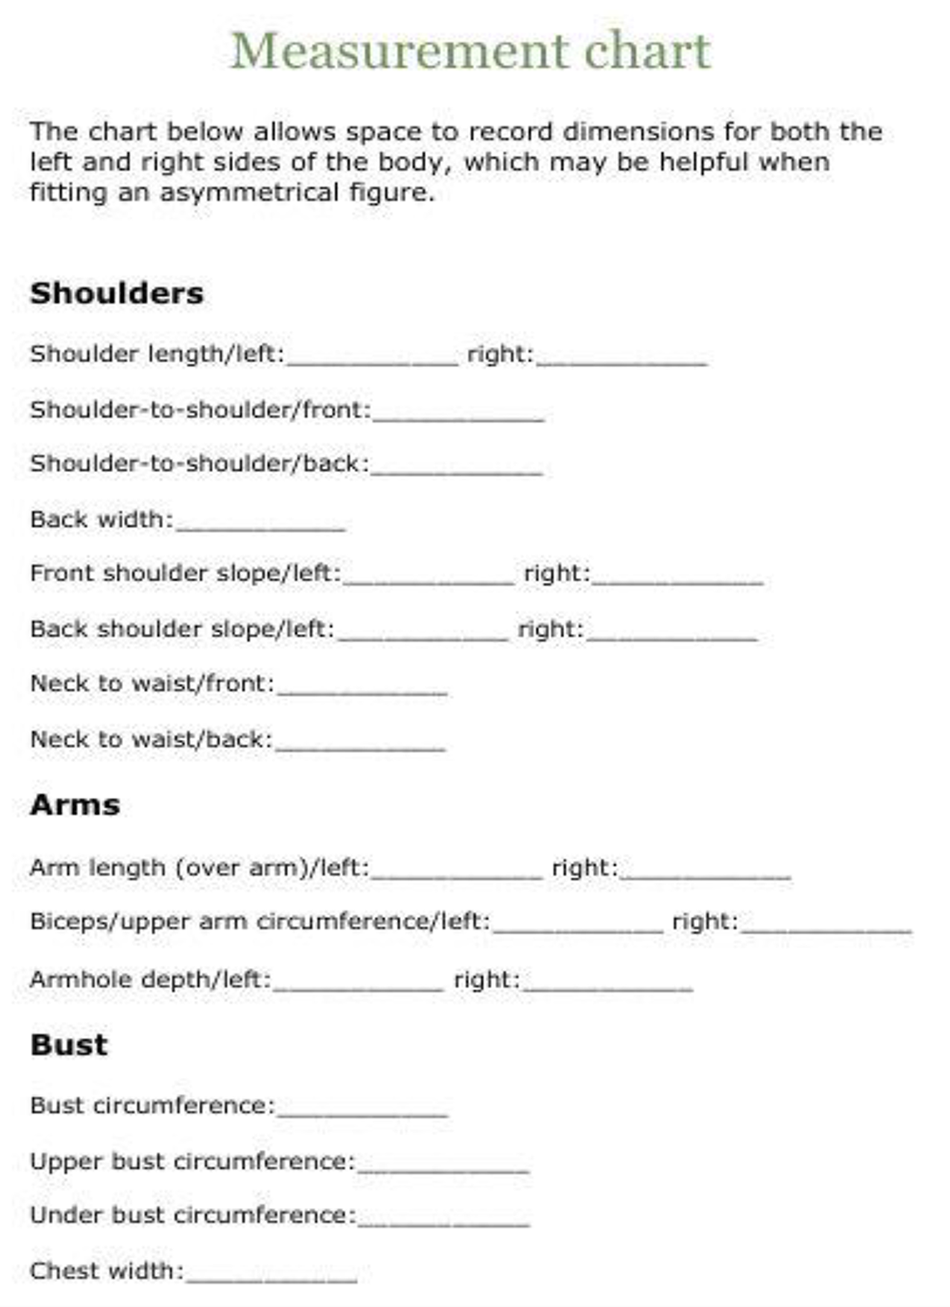
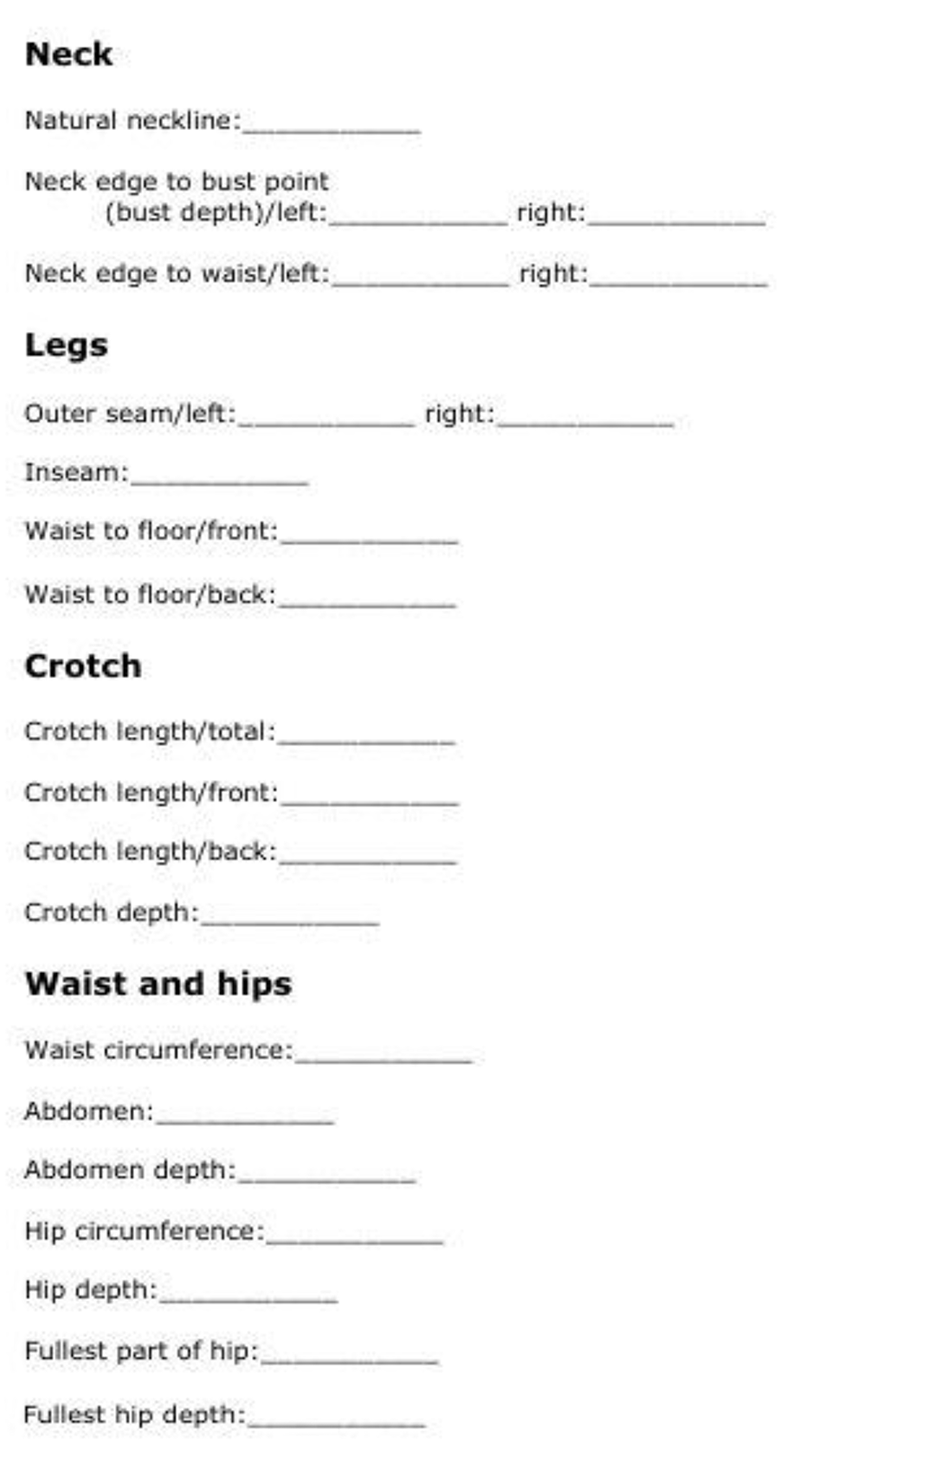
There are multiple measurement charts available in sewing books, online, and in our own library of resources. The ASG measurement guide (attached) is a useful resource as is the Threads Magazine measurement chart (attached). Personalized measurement charts are also good resources. The “right” measurement chart to use is the one that works for you for the garments that you make.
-Note: different charts may use different wording for the same measurement
Taking Measurements
Use the right tools: A friend to help you a fine chain necklace (to find your natural neckline) non-stretch tape measure, narrow elastic (to find your waistline), a full-length mirror (if measuring yourself), narrow tape small adhesive dots washable markers (to draw lines on skin and/or undergarments) pins a 12-inch ruler a form-fitting T-shirt with set-in sleeves- to help identify an armhole
(optional) twill tape/cotton cording- for marking crotch length (optional) Measurement chart (ASG, Threads or your personal Measurement Chart) Start at the top of the body and work down
The Threads Magazine Website Fitting Section has a series of articles and videos for taking measurements and fitting techniques for a variety of garments and fitting issues.
http://www.threadsmagazine.com/category/fitting
Now What?
Perfecting the pattern to our body measurements is next. Comparing our body measurements to the measurements given on a printed pattern is essential in ensuring the fit we want in a garment. Ease generally refers to the amount of extra room for circumference measurements at Bust, Waist and Hips. If, for example, you have a dress that is designed for the bodice to drape a bit over a belt at the waist, that would be lengthwise ease and a design choice by the pattern designer.
How to find the amount of ease
Subtract the intended body measurement from the measurement of the pattern to
determine the amount of ease the pattern has in its unaltered state
– Pattern Measurement at X – Body Measurement at X = Intended Amount of Ease e.g. 40” – 34” = 6” ease
When perfecting the pattern, keep ease in mind…
– It is important to account for the amount of ease the designer intended for the garment we are making. In the above example, we have 6” of ease. If our body measurement is 37” instead of 34”, that gives us 3” of ease. There is room for the garment to fit, however, the garment will not fit the way the designer intended because the pattern as originally drafted and printed is designed for 6” of ease. The pattern will need to be perfected to allow for the 6” of ease as originally designed.
References and Resources
ASG Resources: www.asg.org
Measurement Chart: https://www.asg.org/files/resources/MeasurementChart.pdf
Ease Guide: https://www.asg.org/category/fitting/ – includes a hotlink to an ease fitting chart from the Plano, Texas ASG Chapter
Books:Your personal library of resources is the first place to look
Dunham, Gina Renee, The Fitting Book, Gina Renee Designs, 2021, Zurich.
Morris, Mary and McCann, Sally, Every Sewer’s Guide to the Perfect Fit, Lark Books, 1997, Asheville.
Websites:
Cashmerette (Sewing for Curves) Patterns Sizing Guide: (unique to this company)
https://www.cashmerette.com/pages/sizing
Threads Magazine: http://www.threadsmagazine.com
Articles:
Threads Magazine, How to Get Accurate Body Measurements, December/January 2006.
Threads Magazine, Essential Measuring Points for Fitting a Pattern, #181,
October/November 2015
Measurement Chart Hotlinks:
https://www.threadsmagazine.com/project-guides/learn-to-sew/how-to-measure-up
click on printable version near end of article
https://images.threadsmagazine.com/app/uploads/2015/02/28132112/TYTSBonus-Measurement-Chart.pdf
Video:
https://www.threadsmagazine.com/project-guides/learn-to-sew/mark-your-measurements
YouTube:
Intro to Body Measurements for Sewing Patterns with The Crafty Gemini
https://www.youtube.com/watch?v=ajdM2TqReh